How to Enable Network Traffic Inspection
This guide shows you how to set up network traffic inspection for the Privacy AI app. This is useful for developers who want to see what data is being sent to and received from AI services.
What You Need
- A computer (Mac or Windows) to run the inspection tool
- Your iPhone or iPad with Privacy AI installed
- Both devices on the same Wi-Fi network
Part 1: Set Up Your Computer
On Mac
Step 1: Install mitmproxy
Open Terminal and run:
brew install mitmproxy
If you don't have Homebrew installed, visit https://brew.sh first.
Step 2: Choose a Certificate
You have two options for the certificate. Choose one:
Option A: Use mitmproxy's Built-in Certificate (Easier)
mitmproxy comes with its own certificate. This is the simpler option:
- Start mitmproxy once to generate its certificate:
mitmproxy - Press
qto quit after it starts - The certificate files are now in
~/.mitmproxy/ - Skip to Step 4 (you don't need to set up a custom confdir)
For detailed instructions, see: https://docs.mitmproxy.org/stable/concepts/certificates/#quick-setup
Option B: Use Privacy AI's Certificate
Privacy AI includes its own certificate. Use this option if you want the same certificate on multiple devices:
- Open Privacy AI on your iPhone/iPad
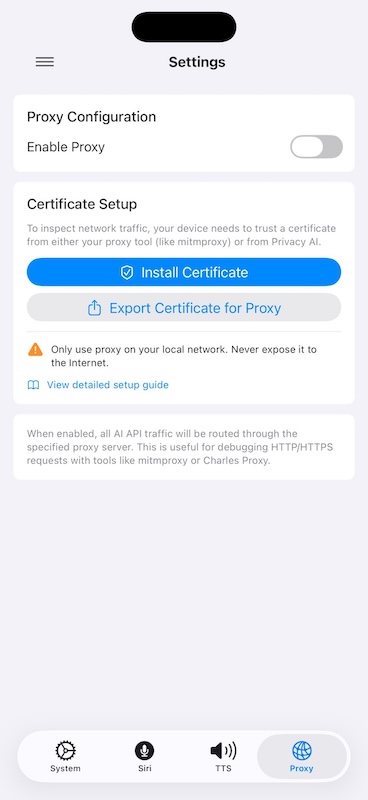
- Go to Settings > Proxy
- Tap Export Certificate for Proxy
- Choose how to send the files to your Mac:
- AirDrop: Select your Mac from the list (fastest method)
- Email: Send to yourself and download the attachment
- Save to Files: Save to iCloud Drive, then access from your Mac
- Save the files somewhere you can find them (e.g., Desktop)
Step 3: Set Up the Certificate for mitmproxy
Skip this step if you chose Option A (mitmproxy's built-in certificate).
If you chose Option B (Privacy AI's certificate):
Create a folder for mitmproxy settings:
mkdir -p ~/mitmproxy_configCopy the combined certificate to this folder with the name mitmproxy expects:
cp /path/to/PrivacyAIProxyCA-combined.pem ~/mitmproxy_config/mitmproxy-ca.pemReplace
/path/to/with where you saved the file (e.g.,~/Desktop/)
Step 4: Start mitmproxy
Run one of these commands depending on which certificate option you chose:
If you chose Option A (mitmproxy's built-in certificate):
mitmweb --mode regular --listen-port 8081
If you chose Option B (Privacy AI's certificate):
mitmweb --mode regular --listen-port 8081 --set confdir=~/mitmproxy_config
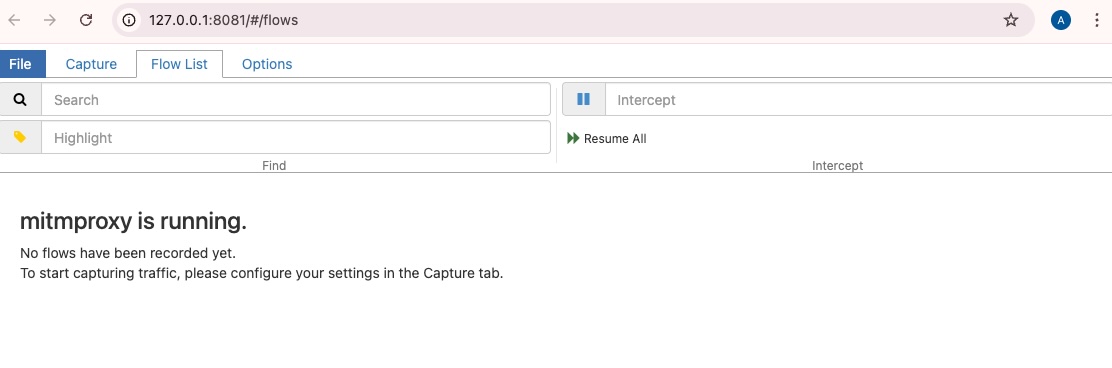
You should see the mitmproxy interface appear. Keep this window open.
Step 5: Find Your Computer's IP Address
- Open System Settings > Network
- Click on your Wi-Fi connection
- Look for the IP address (it looks like 192.168.x.x or 10.x.x.x)
- Write this down - you'll need it for your iPhone/iPad
On Windows
Step 1: Install mitmproxy
- Visit https://mitmproxy.org
- Download the Windows installer
- Run the installer and follow the prompts
Step 2: Choose a Certificate
You have two options for the certificate. Choose one:
Option A: Use mitmproxy's Built-in Certificate (Easier)
mitmproxy comes with its own certificate. This is the simpler option:
- Open Command Prompt and start mitmproxy once:
mitmproxy - Press
qto quit after it starts - The certificate files are now in
C:\Users\YourName\.mitmproxy\ - Skip to Step 4 (you don't need to set up a custom confdir)
For detailed instructions, see: https://docs.mitmproxy.org/stable/concepts/certificates/#quick-setup
Option B: Use Privacy AI's Certificate
Privacy AI includes its own certificate. Use this option if you want the same certificate on multiple devices:
- Open Privacy AI on your iPhone/iPad
- Go to Settings > Proxy
- Tap Export & Share
- Choose how to send the files to your Windows PC:
- Email: Send to yourself and download the attachment
- Save to Files: Save to iCloud Drive or OneDrive, then access from your PC
- USB: Connect your device and copy files via iTunes/Finder
- Save the files somewhere you can find them (e.g., Desktop)
Step 3: Set Up the Certificate for mitmproxy
Skip this step if you chose Option A (mitmproxy's built-in certificate).
If you chose Option B (Privacy AI's certificate):
- Create a folder:
C:\mitmproxy_config - Copy
PrivacyAIProxyCA-combined.pemto this folder - Rename it to
mitmproxy-ca.pem
Step 4: Start mitmproxy
Open Command Prompt and run one of these commands:
If you chose Option A (mitmproxy's built-in certificate):
mitmproxy --mode regular --listen-port 8080
If you chose Option B (Privacy AI's certificate):
mitmproxy --mode regular --listen-port 8080 --set confdir=C:\mitmproxy_config
Step 5: Find Your Computer's IP Address
- Open Settings > Network & Internet > Wi-Fi
- Click on your connected network
- Scroll down to find "IPv4 address"
- Write this down
Part 2: Set Up Your iPhone or iPad
Step 1: Install the Certificate
- Open Privacy AI app
- Go to Settings > Proxy
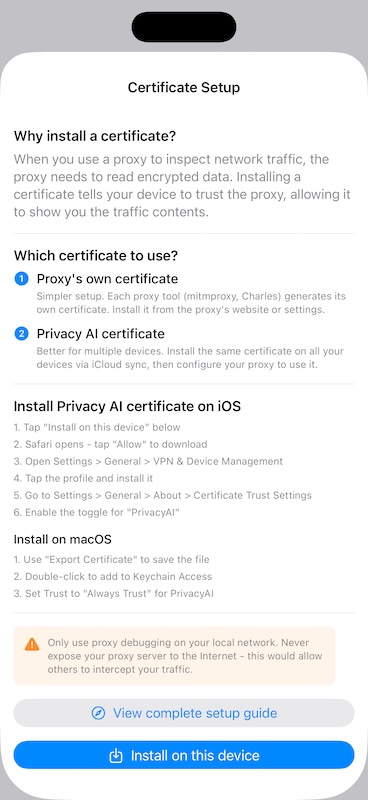
- Tap Install Certificate or the guide button
- Tap Install on this device
- Safari will open and download the certificate
- You'll see a message saying "Profile Downloaded"
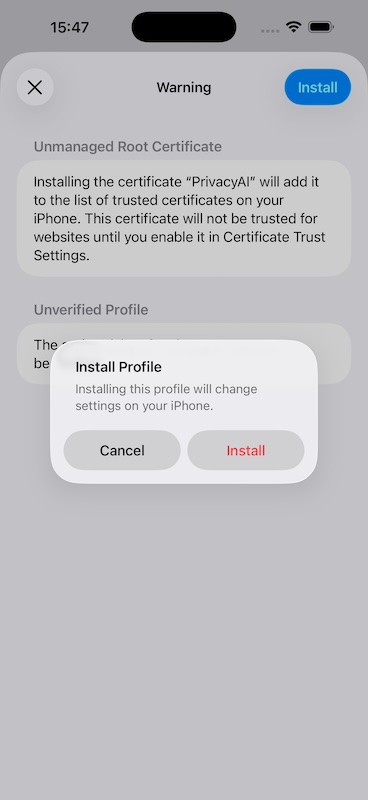
Step 2: Install the Profile
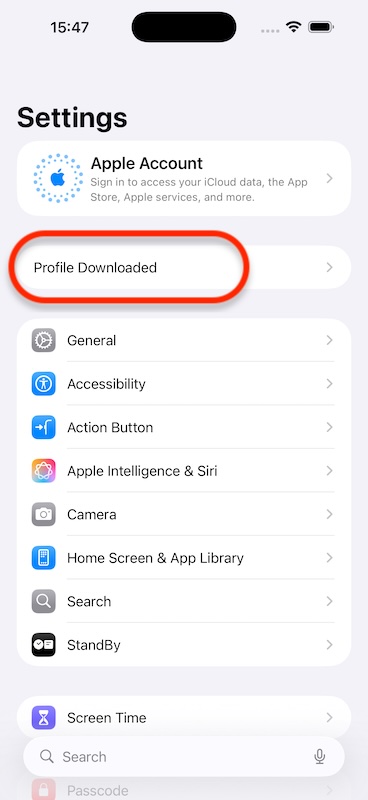
- Open the Settings app on your device
- You should see "Profile Downloaded" near the top - tap it
- If you don't see it, go to Settings > General > VPN & Device Management
- Tap the PrivacyAI Proxy Certificate profile
- Tap Install in the top right
- Enter your device passcode
- Tap Install again to confirm
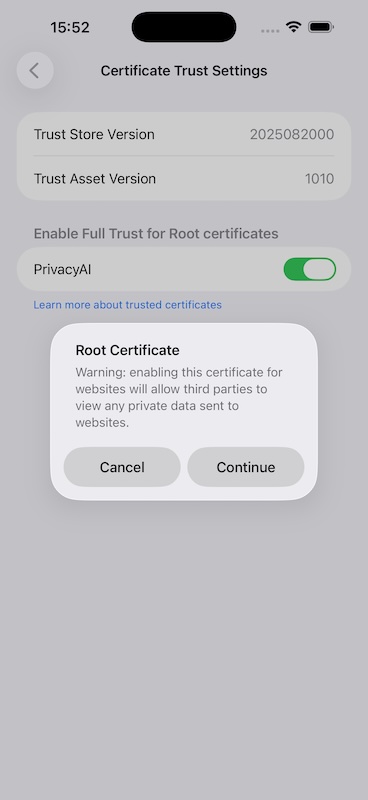
Step 3: Trust the Certificate
This is a critical step that's easy to miss:
- Go to Settings > General > About
- Scroll to the bottom and tap Certificate Trust Settings
- Find PrivacyAI in the list
- Turn ON the toggle next to it
- Tap Continue on the warning message
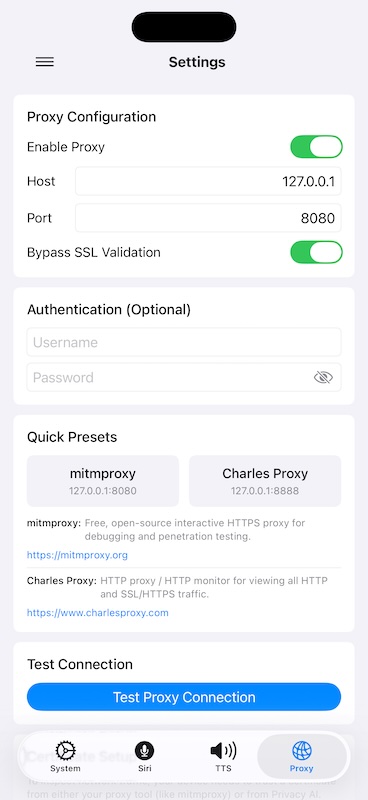
Step 4: Enable Proxy in Privacy AI
- Open Privacy AI app
- Go to Settings > Proxy
- Turn ON Enable Proxy
- Enter your computer's IP address in the Host field
- Keep the Port as 8080
- Tap Test Connection to verify it works
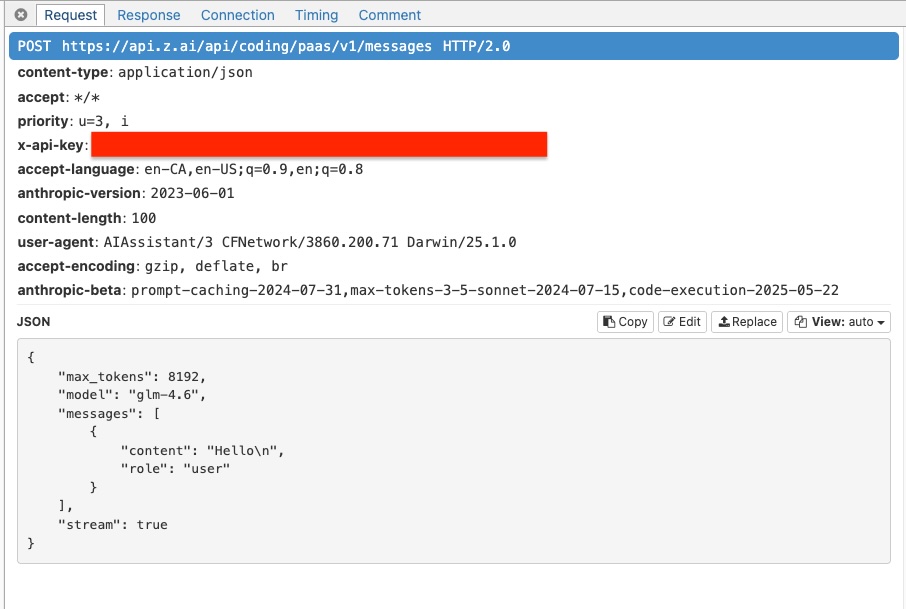
Part 3: Start Inspecting Traffic
- Make sure mitmproxy is running on your computer
- Make sure proxy is enabled in Privacy AI
- Send a message in Privacy AI
- Watch the mitmproxy window - you should see the requests appear!
Troubleshooting
"Certificate not trusted" or TLS errors
- Make sure you completed Step 3 in Part 2 (trusting the certificate)
- The toggle in Certificate Trust Settings must be ON
"Connection failed" when testing
- Make sure both devices are on the same Wi-Fi network
- Check that mitmproxy is running on your computer
- Verify the IP address is correct
- Make sure your computer's firewall allows connections on port 8080
Can't see any traffic in mitmproxy
- Make sure proxy is enabled in Privacy AI settings
- Try sending a test message
- Check the host and port settings match
mitmproxy shows errors
- Make sure you copied the certificate file correctly
- The file must be named exactly
mitmproxy-ca.pem - The file must be in the confdir folder
When You're Done
To stop inspecting traffic:
- In Privacy AI, go to Settings > Proxy and turn OFF Enable Proxy
- On your computer, press
qin mitmproxy to quit
You can leave the certificate installed on your device - it won't affect normal usage when the proxy is disabled.
Need Help?
If you're having trouble, please visit our support page or create an issue on GitHub.